For the Realtime Celestial Rendering Paper, I made a dynamic, responsive stary sky that the player would see while exploring the star system. To do this, I wrote a some shaders that renders onto a cubemap texture target, which could then be used as a simple skybox or as an animated radiance / irradiance cubemap for Physically Based Rendering.
To make this more manageable and portable, the shader was written in HLSL rather than using Unreal's Material compositor tools.
Not that it isn't possible with the custom node in Unreal's Material Editor, but C++ gives you more programmatic freedom. Another direction could have been to use the option to convert Unreal materials to HLSL code.
Step By Step Process:
Create Shader Plugin
Use Unreal Plugin Wizard
Create a subclass of the FGlobalShader Class
Write your .usf (Unreal Shader Format) file.
Bind Uniforms
Execute Shader in Game Engine
create a new YourShaderPlugin(params) object.
Update the render target whenever you would like.
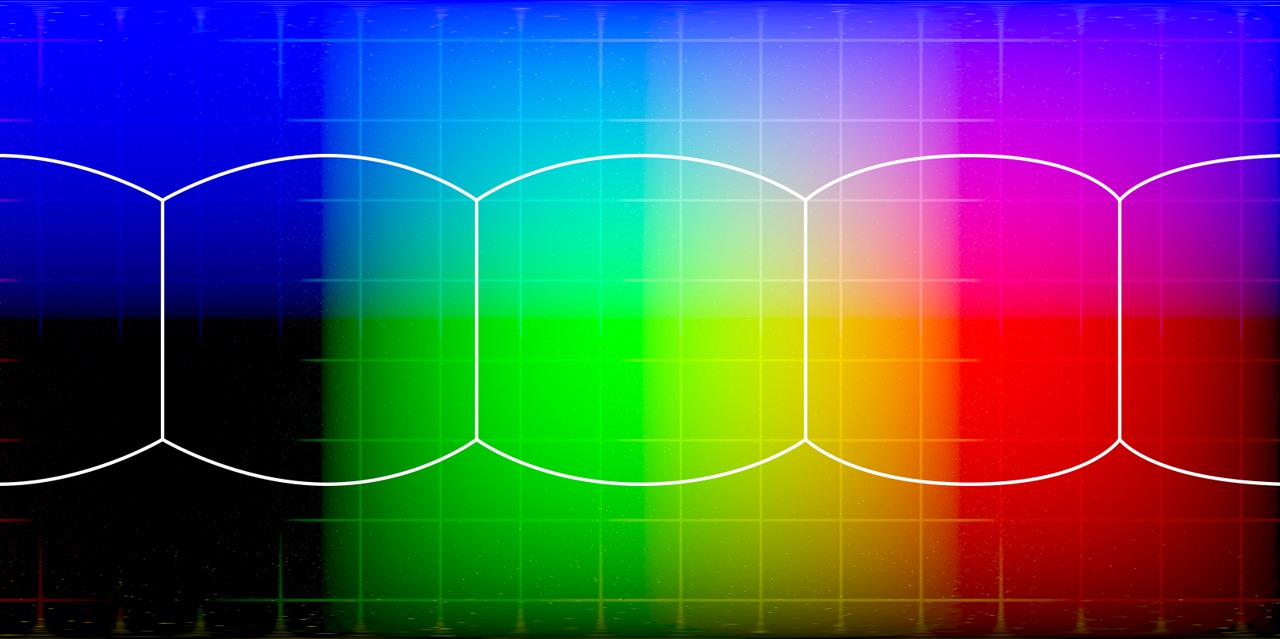
Cubemap Textures
A Cubemap Texture is a 6 sided texture that allows for very low cost sampling of an environmental texture that can serve as a skybox or mapped onto any object with normals, or mapped onto a cube. This means this texture could potentially be used as a light source for PBR calculations, so it's a good idea to make it an HDR texture for skyboxes.
There's several ways to map a cubemap texture, linearly, boxlike, panoramic (what unreal uses), having 6 separate textures. The standard is currently native cubemaps since they're fast, can easily be used as light sources or reflection sources.
Unreal Structure
The Render Hardware Interface (RHI) is Unreal's rendering abstraction layer that communicates with OpenGL or DirectX, and this, combined with a cross compiler for HLSL code, let's you write platform independent shaders. It's from here and related systems like the RenderCore, Renderer, and ShaderCore where we'll be getting our data structures/macros. Here's a few of the headers involved with the RHI.
├─ UnrealEngine/Engine/Source/Runtime/RHI/
│  ├─ RHICommandList.h    # Manages Rendering Queue
│  └─ RHIResources.h      # Stores Abstract Graphics Data Structures
└─ UnrealEngine/Engine/Source/Runtime/RenderCore/Public/
   └─ RenderingThread.h   # Rendering requests are Enqueued Here
The RHI manages a rendering queue, handles all render requests. You need to make requests to the RHI to render onto your render target.
Raymarching a Cubemap
The key to raymarching a cubemap is to build a camera matrix to orient rays around, and pass that as a uniform.
The cubemap is then composed from 6 render target shader executions:
//Camera Matrix StructstructFLocal
{
/** Creates a transformation for a cubemap face, following the D3D cubemap layout. */static FMatrix CalcCubeFaceTransform(ECubeFace Face){
staticconst FVector XAxis(1.f, 0.f, 0.f);
staticconst FVector YAxis(0.f, 1.f, 0.f);
staticconst FVector ZAxis(0.f, 0.f, 1.f);
// vectors we will need for our basisFVector vUp(YAxis);
FVector vDir;
switch (Face)
{
case CubeFace_PosX:
vDir = XAxis;
break;
case CubeFace_NegX:
vDir = -XAxis;
break;
case CubeFace_PosY:
//Reversed PosY and -Y...
vUp = ZAxis;
vDir = -YAxis;
break;
case CubeFace_NegY:
vUp = -ZAxis;
vDir = YAxis;
break;
case CubeFace_PosZ:
vDir = ZAxis;
break;
case CubeFace_NegZ:
vDir = -ZAxis;
break;
}
// derive right vector by cross productFVector vRight(vUp ^ vDir);
// create matrix from the 3 axesreturnFBasisVectorMatrix(vRight, vUp, vDir, FVector::ZeroVector);
}
};
for (int32 faceidx = 0; faceidx < (int32)ECubeFace::CubeFace_MAX; faceidx++)
{
const ECubeFace TargetFace = (ECubeFace)faceidx;
const FMatrix ViewRotationMatrix = FLocal::CalcCubeFaceTransform(TargetFace);
ENQUEUE_UNIQUE_RENDER_COMMAND_THREEPARAMETER(
FPixelShaderRunner,
FCubeRenderTargetShader*, PixelShader, this,
ECubeFace, TargetFace, TargetFace,
FMatrix, ViewRotationMatrix, ViewRotationMatrix,
{
PixelShader->RunShaderInternal(FResolveParams(FResolveRect(), TargetFace), ViewRotationMatrix);
});
}
Then to raymarch it's simply a matter of multiplying the calculated view matrix by a vector built from the UV coordinates of the Input Geometry.
To make managing custom shaders easier, it's a good idea to create a plugin for your Unreal Engine build that features the shader you're making. In this plugin you can put all the logic related to your shader. In our project, I made a plugin called CubeRenderTargetShader, a plugin that gives you the ability to write a shader built into the plugin onto a cubemap.
A shader has two interfaces that it can communicate with:
a constants uniform buffer for rarely changing variables.
a variable uniform buffer for things that change often (per frame variables like time).
the TEXT("string") denotes the name of the uniform. This will be an automatically generated struct you can refer to. Note this needs to be unique to the shader since they can be accessed from any shader.
Now you have everything you need to write your shader! Your shader should be written in as a .usf file, and located in ${ProjectDir}/Shaders. Now making complex shaders isn't too hard, for more details on the subject visit ShaderToy. There's a lot of complex shaders done in GLSL, which shouldn't be too hard to port if you look into the MSDN HLSL Reference. Here's an example of a very simple shader that draws a texture.
Add your Shader to your Game
To run the shader in game, it was a simple matter of making an actor that executes the command to run the shader and provides the shader with a output target.
 Alain Galvan ·3/18/2017 5:30 AM · Updated 2 years ago