Alain Galvan ·6/2/2021 8:30 PM · Updated 5 months ago
An introduction to writing your own custom shaders using Marmoset Toolbag. Create custom shaders for material behavior or screen space effects.
Tags: blogmarmosettoolbagshaderscustom
GitHub Comments
Some artistic visions are hard to achieve without some level of engineering. Creating detailed characters and environments can benefit from using procedural materials to avoid visual repetition and speed up their design. Simulating natural phenomena like broken glass, water caustics [Brinck et al. 2021], newton's rings, or stylistic effects like volumetric hue shifting from Pixar's Soul requires some understanding of the fundamental design of a rendering system.
Let's discuss writing custom shaders with Marmoset Toolbag 4. We'll approach this from the perspective of rendering a raymarched scene, similar to what you might expect from a ShaderToy.
The goal here will be to use this raymarched scene as a generated background for our scene, but it's possible to take this a step further, such as using a raymarched scene as an environment map.
General Design
So the example we'll be using is an effect I made that was heavily inspired by the YouTube channel MKBHD.
The design here isn't too complicated, we use our own camera to ray march a scene of repeating spheres [Quílez 2013] that shift and move according to sinusoidal functions.
Marmoset Toolbag
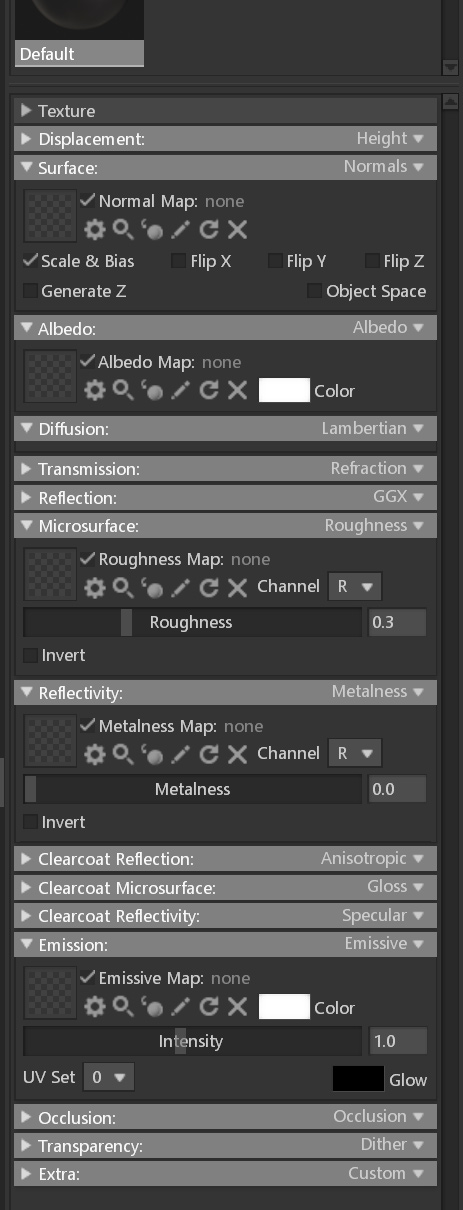
Every material in Toolbag can have a Custom subroutine attached to it, which can then use a shader file to execute your shader. Custom shaders are executed after all the other logic for rendering has occurred, and can be used to overload that logic with your own behavior.
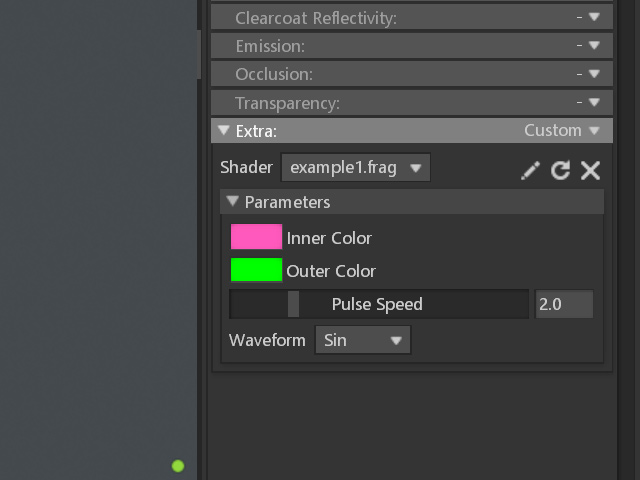
Creating UI Parameters
If you want uniforms to be controllable within the material settings UI, expose a uniform with a comment describing that uniform with the following format:
// 🎨 Coloruniformvec3 uColor; //color name "My Color" default 0.5,0.5,0.5// 🗃️ Dropdownuniformint uDropdown; //name "My Dropdown" default 0 labels "Option 1" "Option 2" "Option 3"// 🎚️ Slideruniformfloat uSlider; //name "My Slider" default 1.0 min 0 max 10
Overloading a Render Pass
Toolbag has a series of categorized executable steps called Subroutines. Each render pass of Toolbag can use a different set of subroutines, allowing toolbag to easily permute the material shader to match the needs of that render pass. [Russell 2014]
You can actually see all subroutines you can overload with custom shaders, they're the drawers that make up the material settings, with the name of the subroutine on the right, and the currently active one on the left. You can also spot all the different subroutines over in the runSubroutines(...) function in <Your Toolbag Installation>/data/shader/mat/mat.frag and <Your Toolbag Installation>/data/shader/mat/mat.comp for ray tracing specific subroutines. Marmoset has a blog post that details each subroutine here.
Nearly all Toolbag subroutines follow a simple interface where they accept one argument, the shader stateFragmentState, which stores relative information like eye direction, normals, etc. to be used across each subroutine in order.
Full Shader
So here's the full custom shader, basically, I'm feeding the output of the shader above to the albedo output, with a material's Diffusion subroutine set to unlit. The material is placed in an object covering the camera, a sphere with all normals pointing inward, and the signed distance field camera is set to match the camera in Toolbag.
 Alain Galvan ·6/2/2021 8:30 PM · Updated 5 months ago